Vendor Store Setup Guide
This guide will walk you through the steps to set up your vendor store so you can start selling your products quickly and confidently. Our setup process is designed to be simple and straightforward—most vendors complete it in just 4–5 minutes.
Let’s get started!
1. Store Setup Wizard
After registering as a vendor, you'll be automatically redirected to our Store Setup Wizard. This helpful tool guides you through the key steps needed to launch your store.
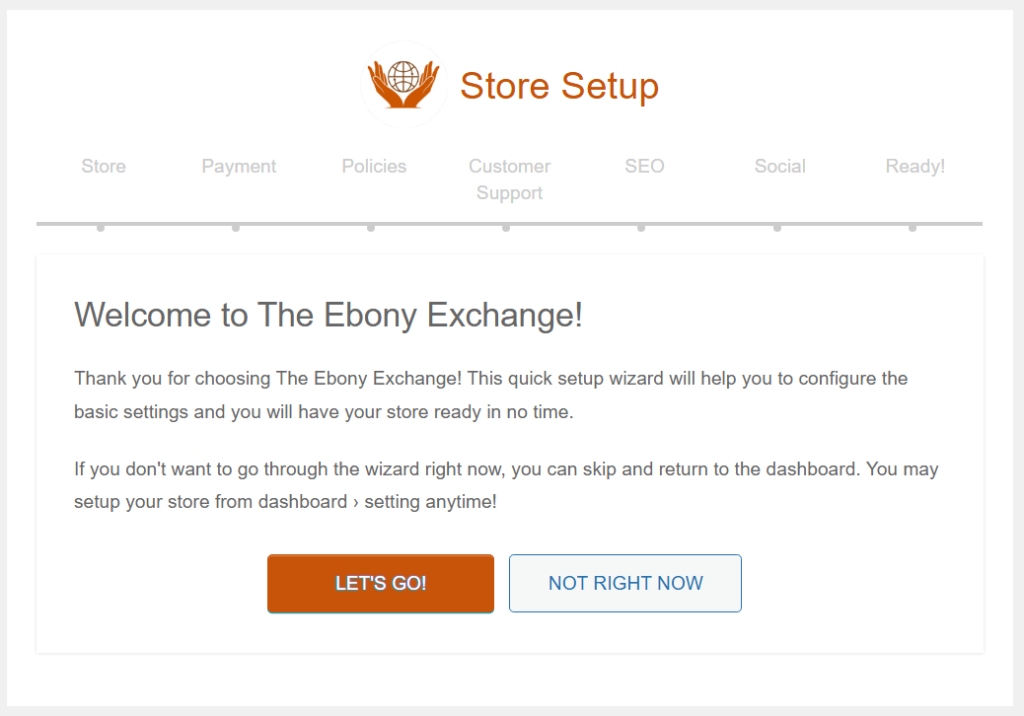
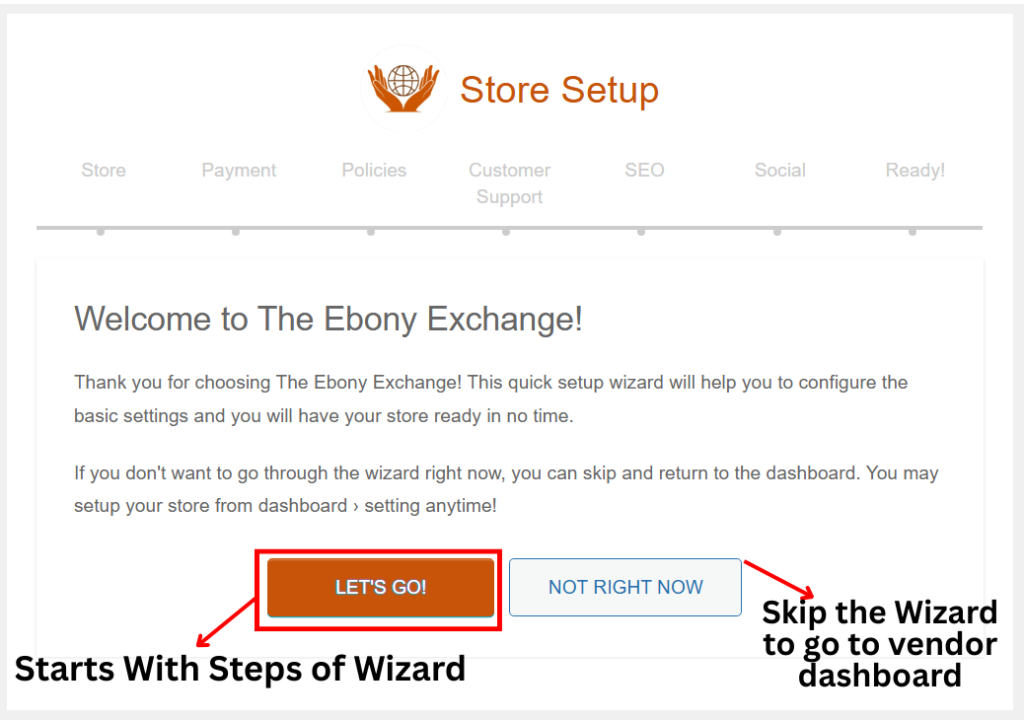
You can either complete the steps in order or skip them and fill in the details later through your Vendor Dashboard. However, we recommend completing the wizard—it saves time and gets your store up and running faster!
The entire process of the wizard should take 4-5 minutes and let’s discuss the steps vividly for better understanding.
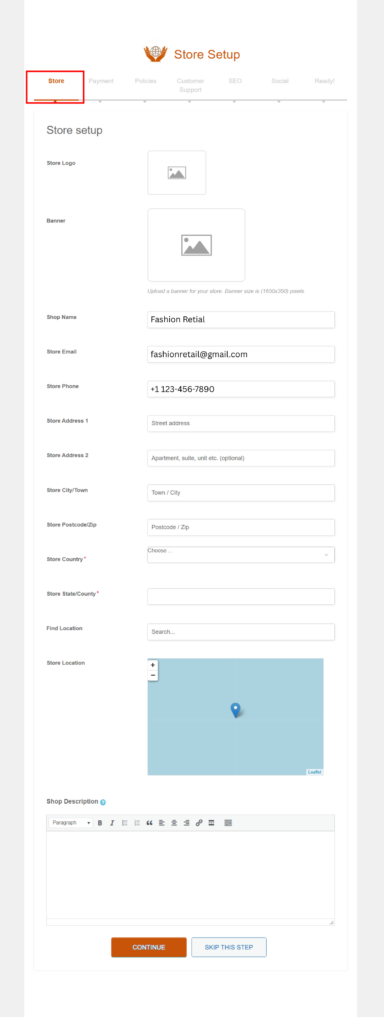
Step 1: Store Details
Add your store information:
- Store logo and banner
- Store address and location
- Store description
Some fields may already be filled in based on your registration. Just complete the rest and click next.
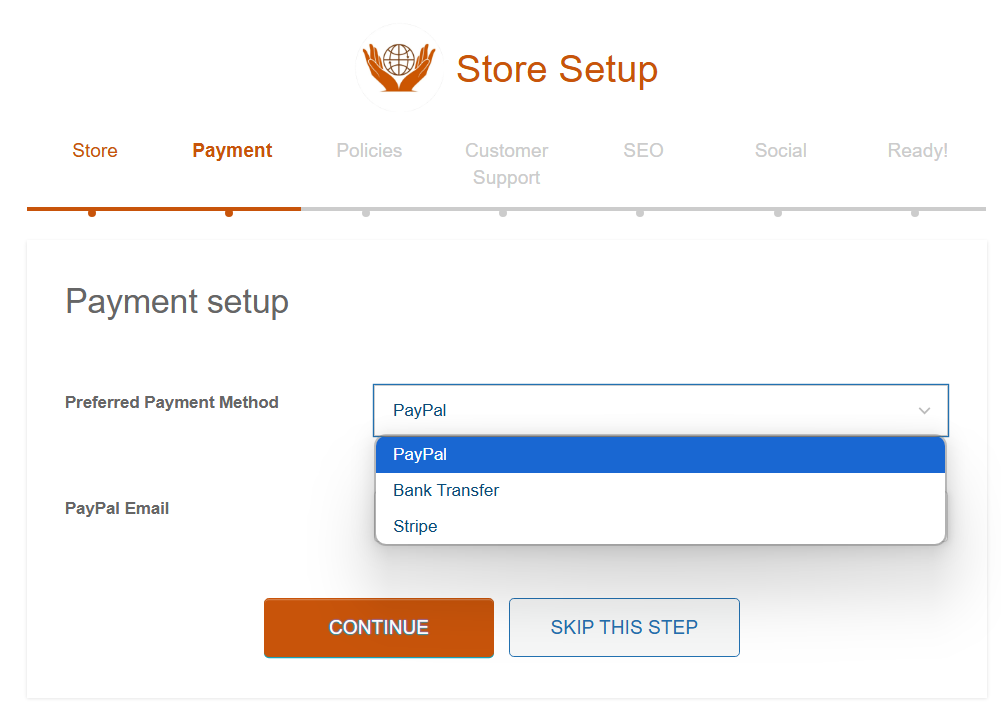
Step 2: Payment Setup
This is where you connect your store to a payment method to get paid!
Depending on what’s supported, you might see options like:
- PayPal
- Stripe
- Bank Transfer
Just enter the necessary details for your preferred payment method, and you’re ready to go.
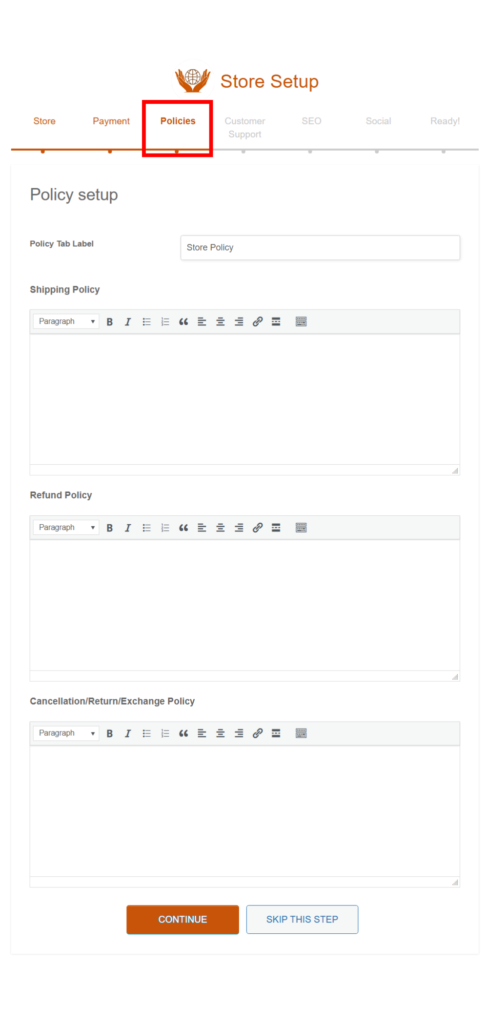
Step 3: Store Policies
Set expectations with your customers by adding your:
- Refund Policy
- Shipping Policy
- Cancellation Policy
You can also customize the label that appears on your store’s policy tab.
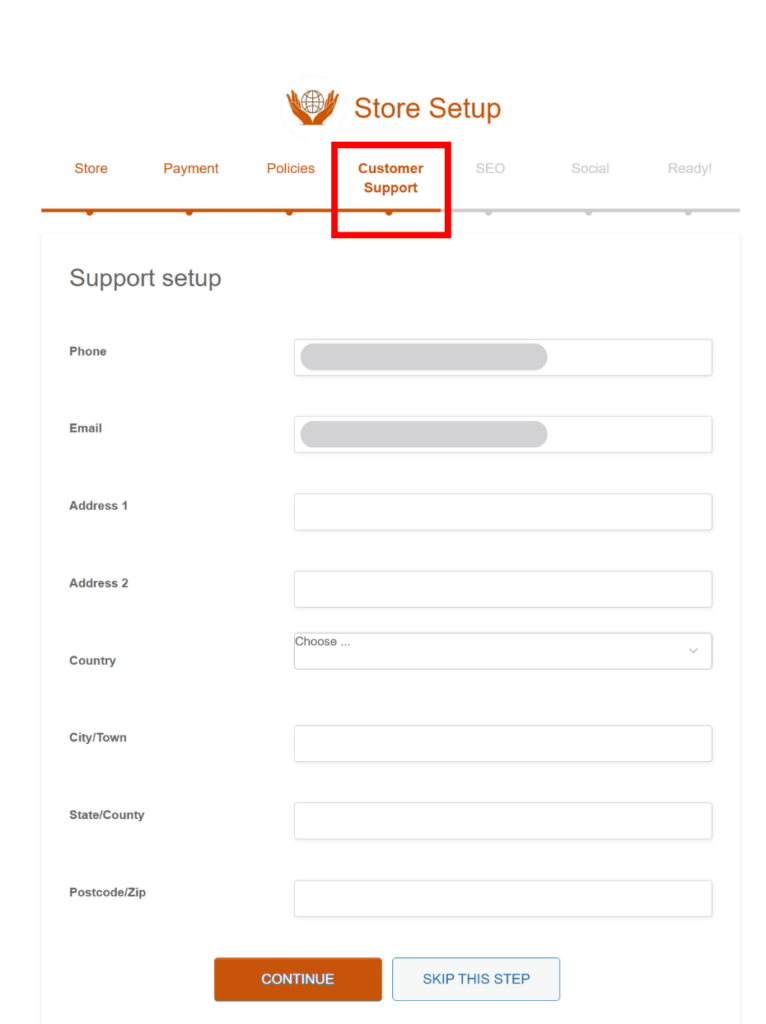
Step 4: Customer Support
Let your customers know how to reach you by adding:
- Support phone number
- Support email address
- Physical mailing address (optional)
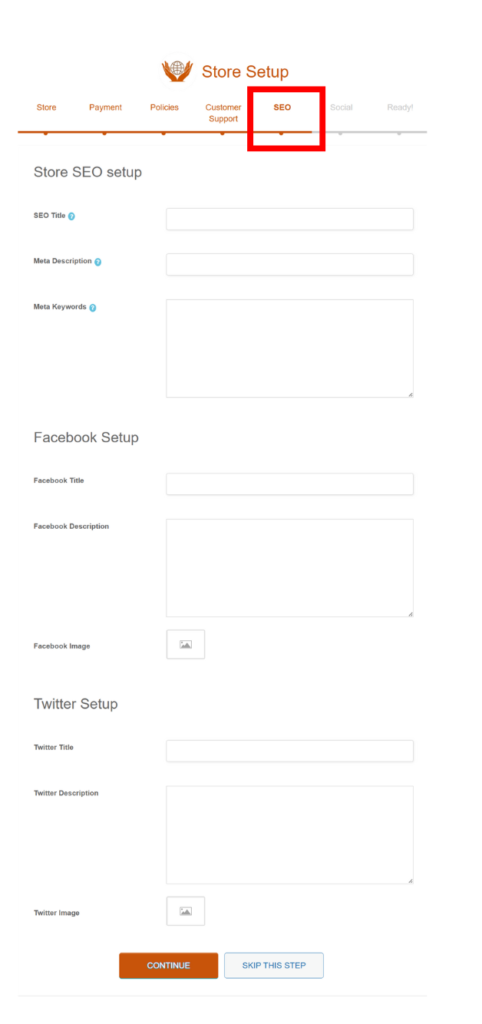
Step 5: SEO Settings
Boost your store’s visibility on Google and social media! Add your:
- SEO title
- Meta description and keywords
- Facebook and Twitter sharing info (title, description, and images)
Step 6: Social Media Links
Increase customer trust and engagement by linking your social media profiles—like your Instagram, Facebook, or Twitter—right to your store page.
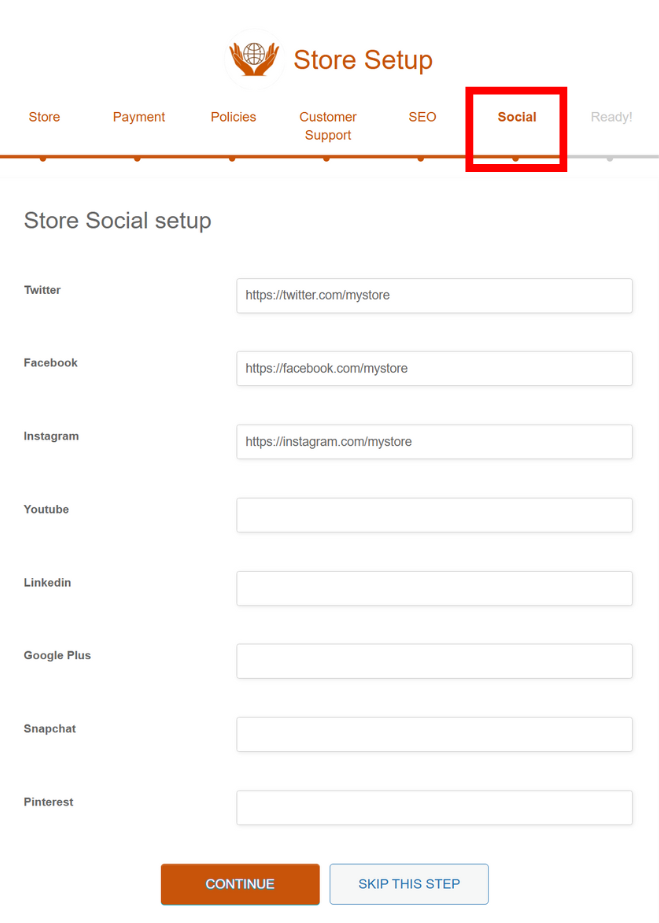
Example Social Media Link
Here’s where one can see the social media links in vendor store page as shown below with twitter, facebook and instagram link as an example.

Step 7: Finish Setup
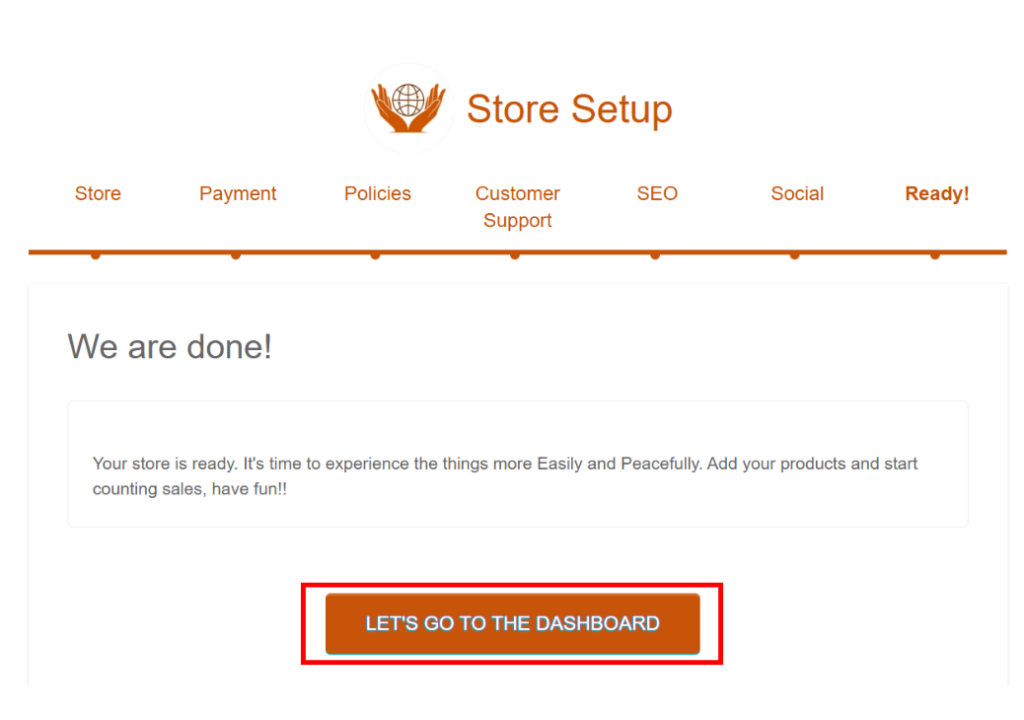
You're all done! You’ll see a confirmation screen. Click “Let’s Go to Dashboard” to access your vendor dashboard.
Dashboard
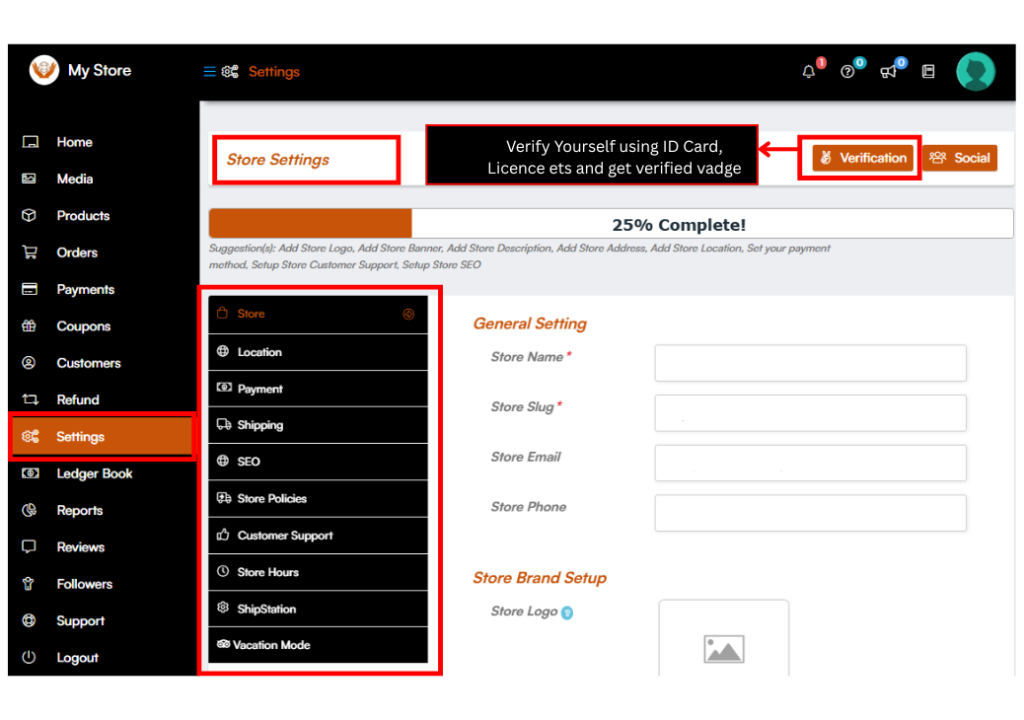
Once you click on ” Let’s go to Dashboard” the vendors will be redirected to their respective Dashboard from where they can fill in the remaining or left-over details and here’s how it looks like.

2. Vendor Dashboard Settings
Missed a step? No problem!
You can always edit or complete your setup by visiting:
Vendor Dashboard → Settings
Get veified and boost trust.
- Identity Verification using any document from these
- National ID Card
- Business Card
- Passport
- Driver's License
AND Verify address.
3. Shipping Setup Guide
Getting your shipping set up correctly ensures a smooth delivery experience for your customers. Here’s how to do it:
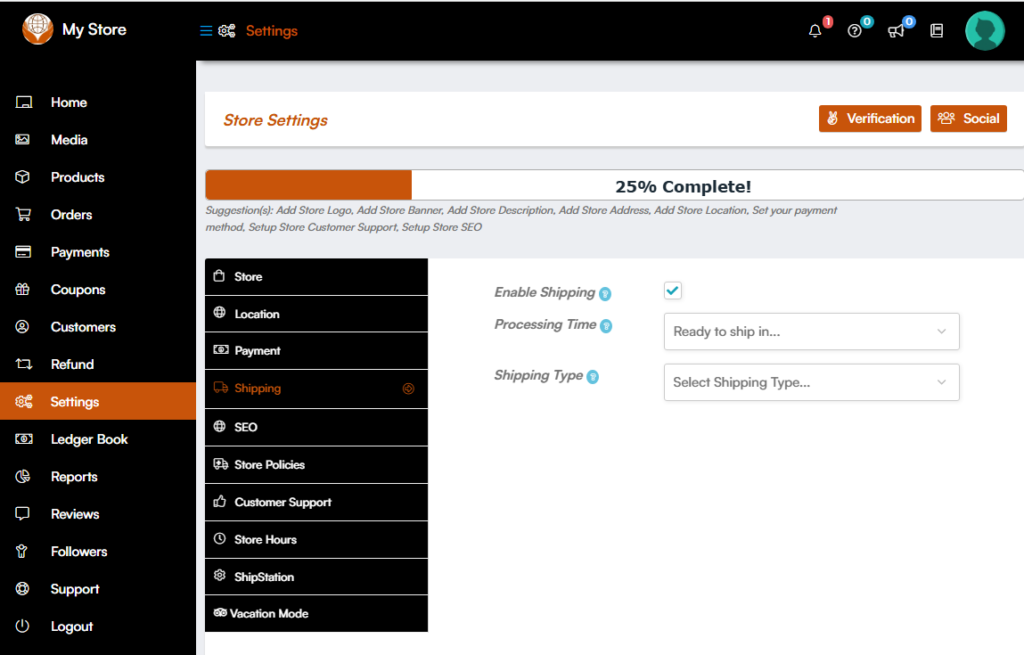
Step 1: Enable Shipping
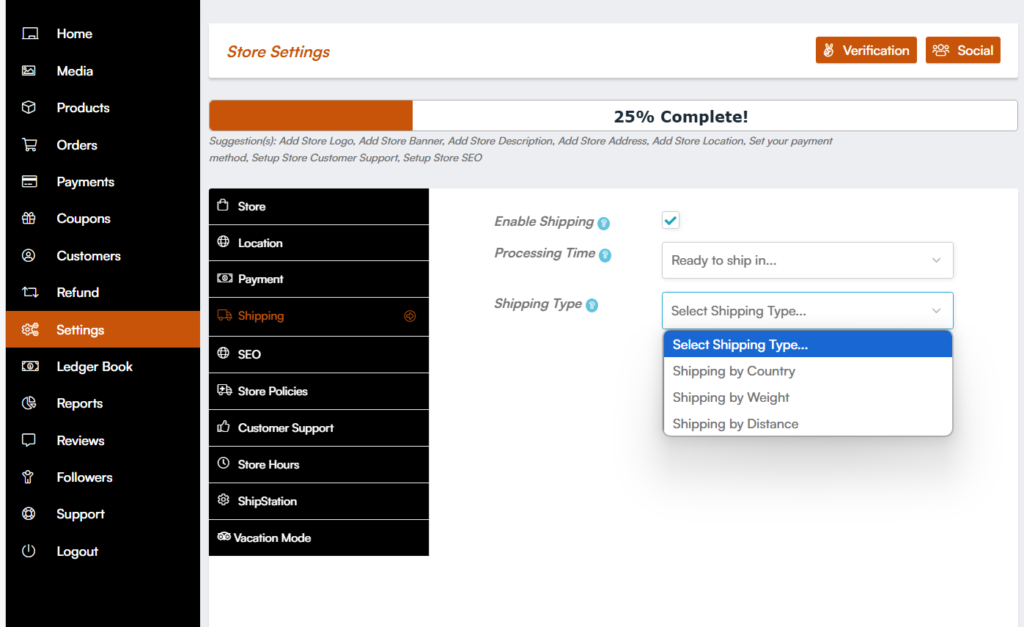
• Go to Vendor Dashboard → Settings → Shipping
• Check the box “Enable Shipping”
Step 2: Set Processing Time
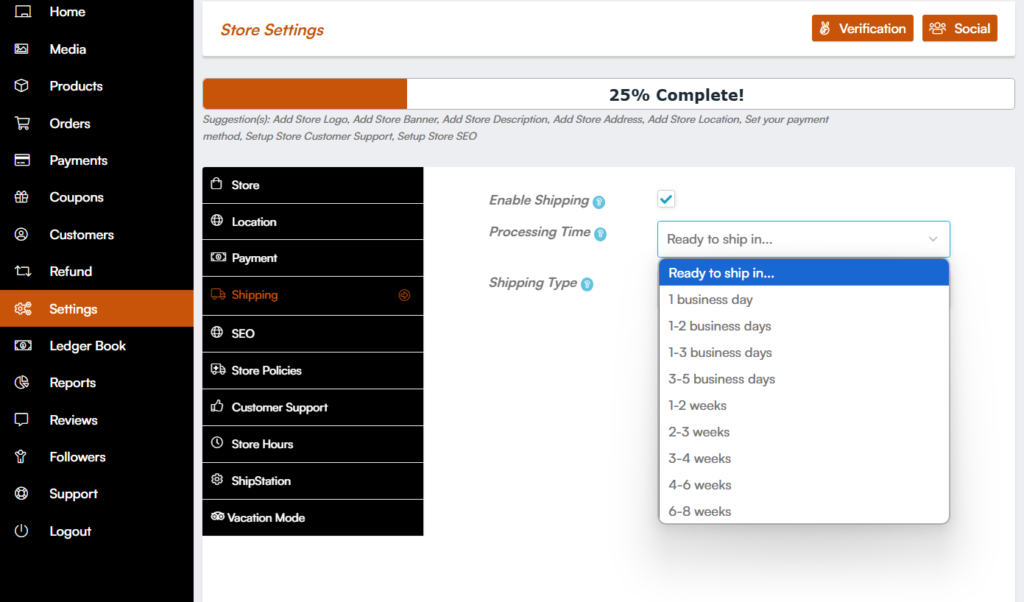
This is how long it takes you to prepare an order before shipping.
Choose a timeframe that works for you, such as:
- 1 business day
- 1–2 business days
- 3–5 business days
- 1–2 weeks
Tip: Be realistic—setting accurate expectations builds trust with buyers.
Step 3: Choose a Shipping Type
Pick the method that fits your products best:
- By Country – Set different rates for different countries
- By Weight – Charge based on total order weight
- By Distance – Charge based on the customer’s distance
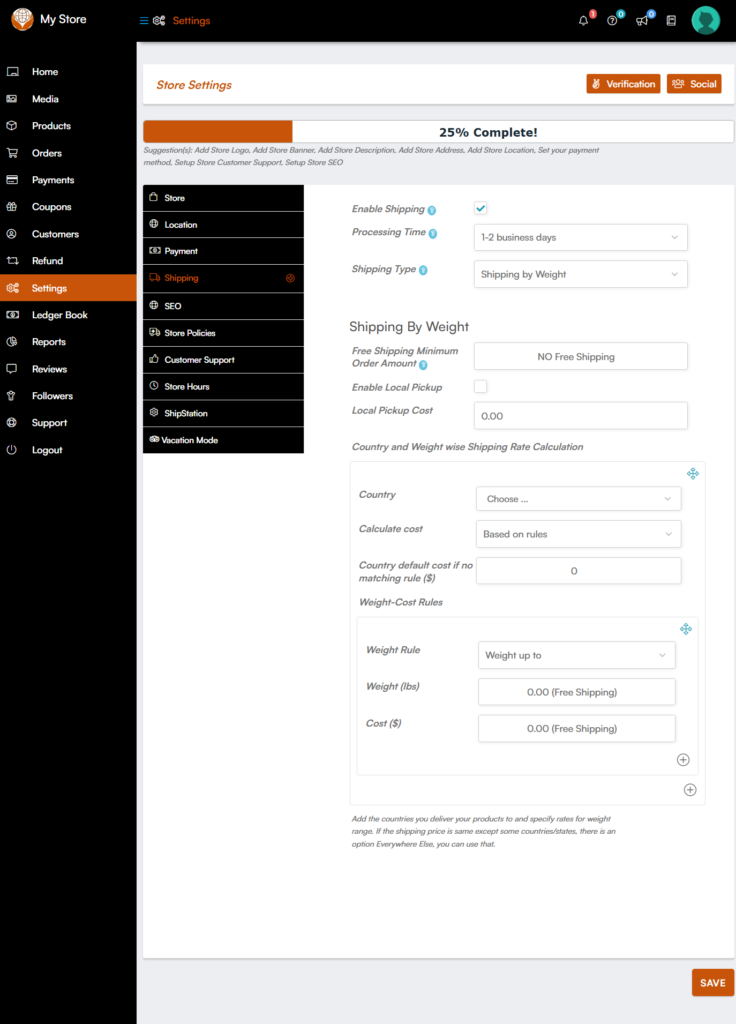
Example Setup:
Enable Shipping: ✔️
- Processing Time: 1–2 business days
- Shipping Type: By Weight
Optional Shipping Settings
- Free Shipping Minimum – Offer free shipping over a certain order amount
- Local Pickup – Allow customers to pick up orders in person
Set Up Country & Weight Rules
Under Country and Weight-wise Shipping:
1. Country: Select where you ship.
2. Calculate Cost: Choose 'Based on rules'.
3. Default Cost: Add a fallback cost.
Add a Weight Rule:
- Example:
- Weight: Up to 1 lb
- Cost: $5.00
Use the ➕ button to add more brackets as needed.
Need Help?
Have a question? Visit: https://theebonyexchange.com/contact-us
Let’s build something amazing together!


